Get $25 Toward ANY Service when you enroll in the NEW Gem Beauty Rewards Program

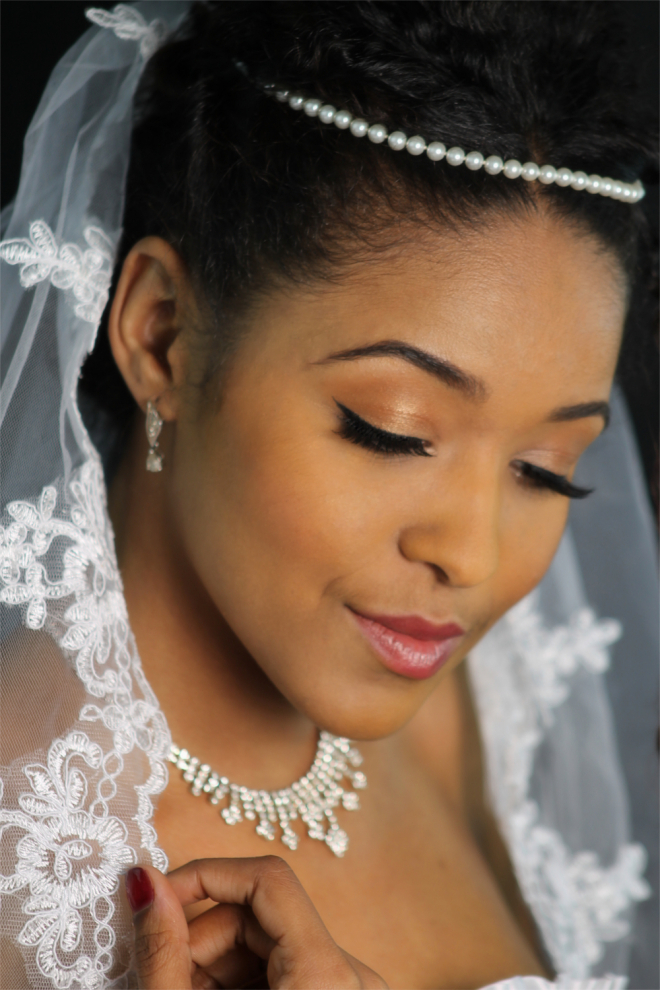
Bridal Beauty Guide (as seen in SSLM Issue 35)

IMG_0610editwebcopy

Skincare
With all the wedding planning, one thing many brides forget to focus on is taking care of
their skin prior to the big day. A proper pre­-wedding skin care routine is key to ensuring a
glowing, radiant bride, and also helps set the stage for a even, long wearing makeup
application. Twice daily use of a cleanser-toner-­moisturiser regimen containing alpha
hydroxy acids, such as Alpha Hydrox, is a great idea for almost any skin type by helping
to improve skin tone, texture, and elasticity. It also helps normalize both dry and oily skin
types.

To avoid irritation or reactions closer to the big day, you should start your new skincare
routine at least six months before tying the knot. This makes sure any spa treatments or
facials have the best chance at getting the results you need. A monthly facial, whether at
the spa or a DIY version at home should be on every bride (or groom!)­-to-­be’s checklist.
However, your should take care that your last facial be at least two weeks before the
wedding, and avoid more potent treatments such as microdermabrasion or chemical
peels for two weeks to a month prior to the ceremony.

Makeup, check. Hair, check.
This one is a given, with the wedding pictures being one of the longest lasting
impressions of the day, the happy couple is typically wants to put their most
well­groomed foot forward. Even people who typically shy away from makeup should opt
for a bit of coverage for pictures. There are many makeup artists and hair stylists who
specialize in weddings, and scheduling a preview and consultation session is the best way to
ensure the exact look you want. Pros have years of experience and training and products
they know that last all day and night in almost any conditions, but the do-­it-­yourself
method has also been gaining quite a bit of popularity in the last few bridal seasons.

Pinterest is a great place to find wedding inspiration, and there are no shortage of
stunning bridal hair and makeup looks to browse. You can easily pin your favorite images,
and many of them link back to easy to follow tutorials. If you aren’t the type of person who
learns from watching a YouTube video another budget friendly option is hiring a
professional makeup artist for a lesson. They can show you a few looks that work with
your specific features, using makeup you already have, and you will be prepared to do
your own makeup for all of your pre­wedding celebrations as well. Above all, make sure
you are comfortable with your wedding look, and don’t let friends or family bully you into a
look that isn’t ‘you’.

Tattoos.. Cover or enhance?
Sometimes, covering up tattoos is required by certain cultural traditions or the parents
helping to pay for the wedding. In that case, your makeup artist should be able to conceal
your tattoo so that it looks like skin and will resist fading and product transfer onto your dress. There are also many tutorials available on YouTube if you would like to try it
yourself at home.

However, many brides these days are proud to show off their ink as they walk down the
aisle. If you are planning to show off your tattoos, choose a dress that flatters your tattoo
placement. For example, dresses with a dip in the back are great for upper back tattoos
and strapless or spaghetti strap gowns accentuate shoulder tattoos. Another trend that
has been on the rise is tattoo enhancement, where makeup artists airbrush and bedazzle
your tattoo to intensify and brighten colors, and even add glitter and gemstones.

Don’t wait ‘til the last minute!
As with the spa type facials, there are several other beauty fixes you will want to stay
away from close to the big day so that your skin is healthy and glowing. For example, if
you are planning to get your eyebrows, or any other facial hair waxed, plan to do so about
a week to 10 days before the wedding. This will ensure any redness or swelling will
subside, and makeup will be able to properly adhere to the skin. Body waxing should be
done at least three to four days ahead of time, more if you have never been waxed or if
your skin is particularly sensitive.

If you are planning to go tanning, opt for a spray tan instead of a bed to avoid harmful UV
rays. At home self-­tanner is also a great option, and St. Tropez is an industry favorite.
Just remember to exfoliate well the days leading up to the tanning, and get your tan about
5 days before the wedding to allow product to settle and avoid transfer onto your dress.
However, keep in mind you should do any waxing or shaving before you tan in order to
maintain a perfectly even glow. If you are new to tanning, make sure you make time for a
trial run in the months leading to the wedding. Also remember, white reflects light, so that
white dress may make what seemed to be a touch of color appear darker in
photographs.


Ashlie Lauren
www.ALaurenArtistry.com
www.ALaurenBridal.com
www.sameexlifemagazine.com


Top 3 ways to tell .. is YOUR makeup artist sanitary?

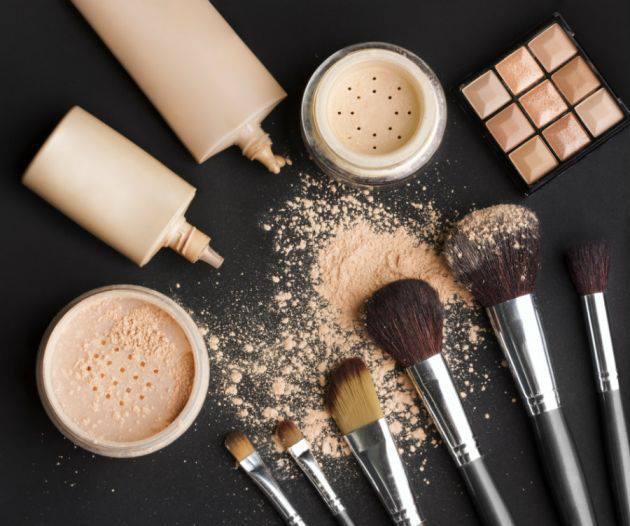
Photo Courtesy of Google Search Getting professional beauty services done should be a fun, relaxing, and most of all SAFE experience. While makeup may seem like a fun profession, you should remember that makeup artists work very closely with sensitive mucous membranes such as your eyes and mouth.  If a complete stranger at the mall came up to you and asked to borrow your lipstick, would you hand it to them? EW, NO! Of course not! You know there are germs that can be passed through that makeup, so there are many steps your makeup artist should be taking to ensure that you do not contract any disease! These are also things you should keep in mind for your next trip to the beauty counter (testers? anyone can touch those!), so pay attention! If you are working with a new beauty professional, (or if you even if you have a regular makeup artist but never really paid attention!) here are some VERY IMPORTANT things you should be watching out for! Disclaimer: This article contains images and descriptions of some of the gross things that can be found in contaminated makeup, and could be considered 'graphic' to some people.

#1

The #1 thing I see when I go to fashion shows that always grosses me out is seeing 'makeup artists' applying the SAME mascara to multiple people - using the SAME applicator that came with the mascara!

I put makeup artists in quotations, because NO makeup artist EVER should do this. Even though I see this from a lot of newer artists, I also have seen people who claim to have been doing makeup for ten years or more do this as well. See, here's the thing. Most people have these things called eyelash mites. It has nothing to do with cleanliness, because they live off of dead skin and the natural oil in your skin. It's perfectly fine that you probably have your own, although according to WiseGeek, "high numbers of eyelash mites can cause irritation and inflammation of a person’s skin. When this happens, a person is said to have a skin condition called demodicosis. Severe infestations of these mites may also lead to infections of the eyes or skin."

A Close-Up View of A Lash Mite Photo Courtesy of Google Search

Kind of cute, no (ok, eek!)? These little guys are a large part of the reason you are supposed to throw out your personal mascara every 2-3 months (but not the ONLY reason). But, imagine someone using the same mascara wand, from the same tube on 20 different people, then using it on you. The same applies for liquid liner, or ANY cream or liquid based product period! Make sure your makeup artist uses a FRESH BRUSH OR WAND FOR EACH DIP INTO THE PRODUCT. If they double dip because they needed more product, they have still contaminated it, and the entire product is now compromised.

#2

The other big thing I see happen a lot is improper sanitary measures when dealing with lip products. This one is a bit more straightforward, and many of us already know not to share lip gloss, but don't take it for granted that your beauty professional is taking appropriate measures to keep you safe (has anyone ever seen Tabatha's Salon Takeover?). Although I rarely see anyone picking up a tube of lipstick and heading straight for someone's lips, I do see what amounts to basically they same thing - double dipping the lip brush into the lipstick palette or onto the lipstick itself. However, as I mentioned before, any liquid and cream based products can become a breeding ground for bacteria! One of the most common things that can be transmitted through makeup besides pink eye is the herpes simplex virus, and that is what could easily be found in contaminated lipsticks or lip palettes.

#3

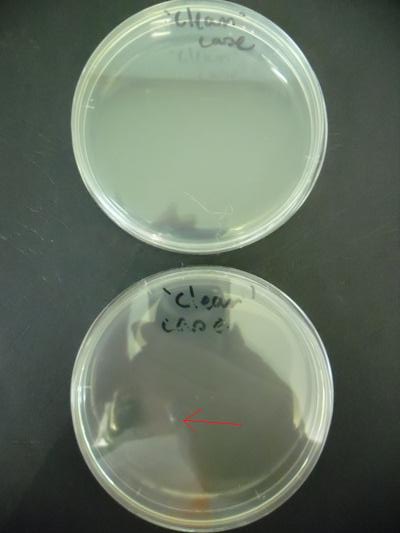
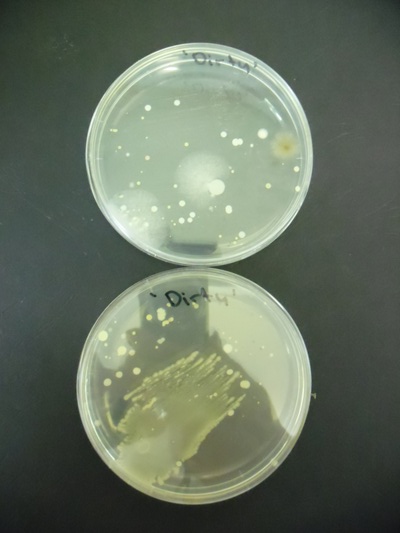
Again, this is one that I see a bit less commonly, but still far too often for my opinion dirty makeup brushes. If you wear makeup on a daily basis, you should be washing your brushes at least once a week or so. A professional makeup artist should wash, or at the very least disinfect them between each and every client. Makeup brush hairs and sponges are porous, which means that they can attract and hold dirt, oil, and dead skin cells, as well as bacteria. Having worked at a beauty counter for almost a year, I can also personally testify that the brushes there were only shampooed once per week, although all employees were supposed to use the provided spray-on brush cleaner and alcohol between customers. I always brought my own brushes from my kit, and shampooed them every night when I went home! One of my favourite 'studies' in the case against dirty brushes is an experiment conducted by Lizzi at Makeup Utopia where she takes clean brushes, a dirty brush, (and of course a control blank), swipes them across a petri dish, and sticks them in an incubator. The bacteria that grew from being exposed to the dirty brush was straight up gross.

Clean Makeup Brushes vs Dirty Makeup Brushes : The Bacteria Within


Clean Makeup Brushes vs Dirty Makeup Brushes : The Bacteria Within

With contaminated makeup, you could develop conjunctivitis (pink eye), dermatitis, blepharitis, staph, impetigo, and ringworm, as well as the aforementioned herpes simplex virus. Keep this in mind when you are at a makeup counter, or are getting your makeup done by someone who you have not yet actively observed using proper sanitation procedures. Dry products like eye shadow and blush can easily be sanitized by wiping the top layer away, and/or spraying with alcohol or makeup sanitizing spray. However, these measures do not work for liquid or cream based products as you run the risk of simply pushing the contaminates further into the product. Also, be aware that the reason you can get your makeup done at a counter for so cheap ($30-$50 on average) is because the store salespeople are using the testers that are available to the public, so proper sanitation there can not be guaranteed. An early red flag for a freelancer charging those same types of rates is also not likely able to invest in the proper tools needed to maintain a sanitary kit, as well as provide quality cosmetics for use on clients, unless they are hobbyists, in which case their lower rate is simply to help offset the costs associated with safe and sanitary makeup application. Unfortunately, this is often not the case, and a lower rate can be a sacrifice of the makeup kit cleanliness. The testers at the mall are free, and when it comes to the bacteria in this case, you get more than you paid for, but keep in mind, I have personally witnessed unsanitary practices from all ends of the experience and/or pricing spectrum!


Urging you to stay safe when it comes to glam time,

Ashlie Lauren www.ALaurenArtistry.com www.ALaurenBridal.com

Makeup AND Photography Photo of the Week

Makeup Photo of the Week!  

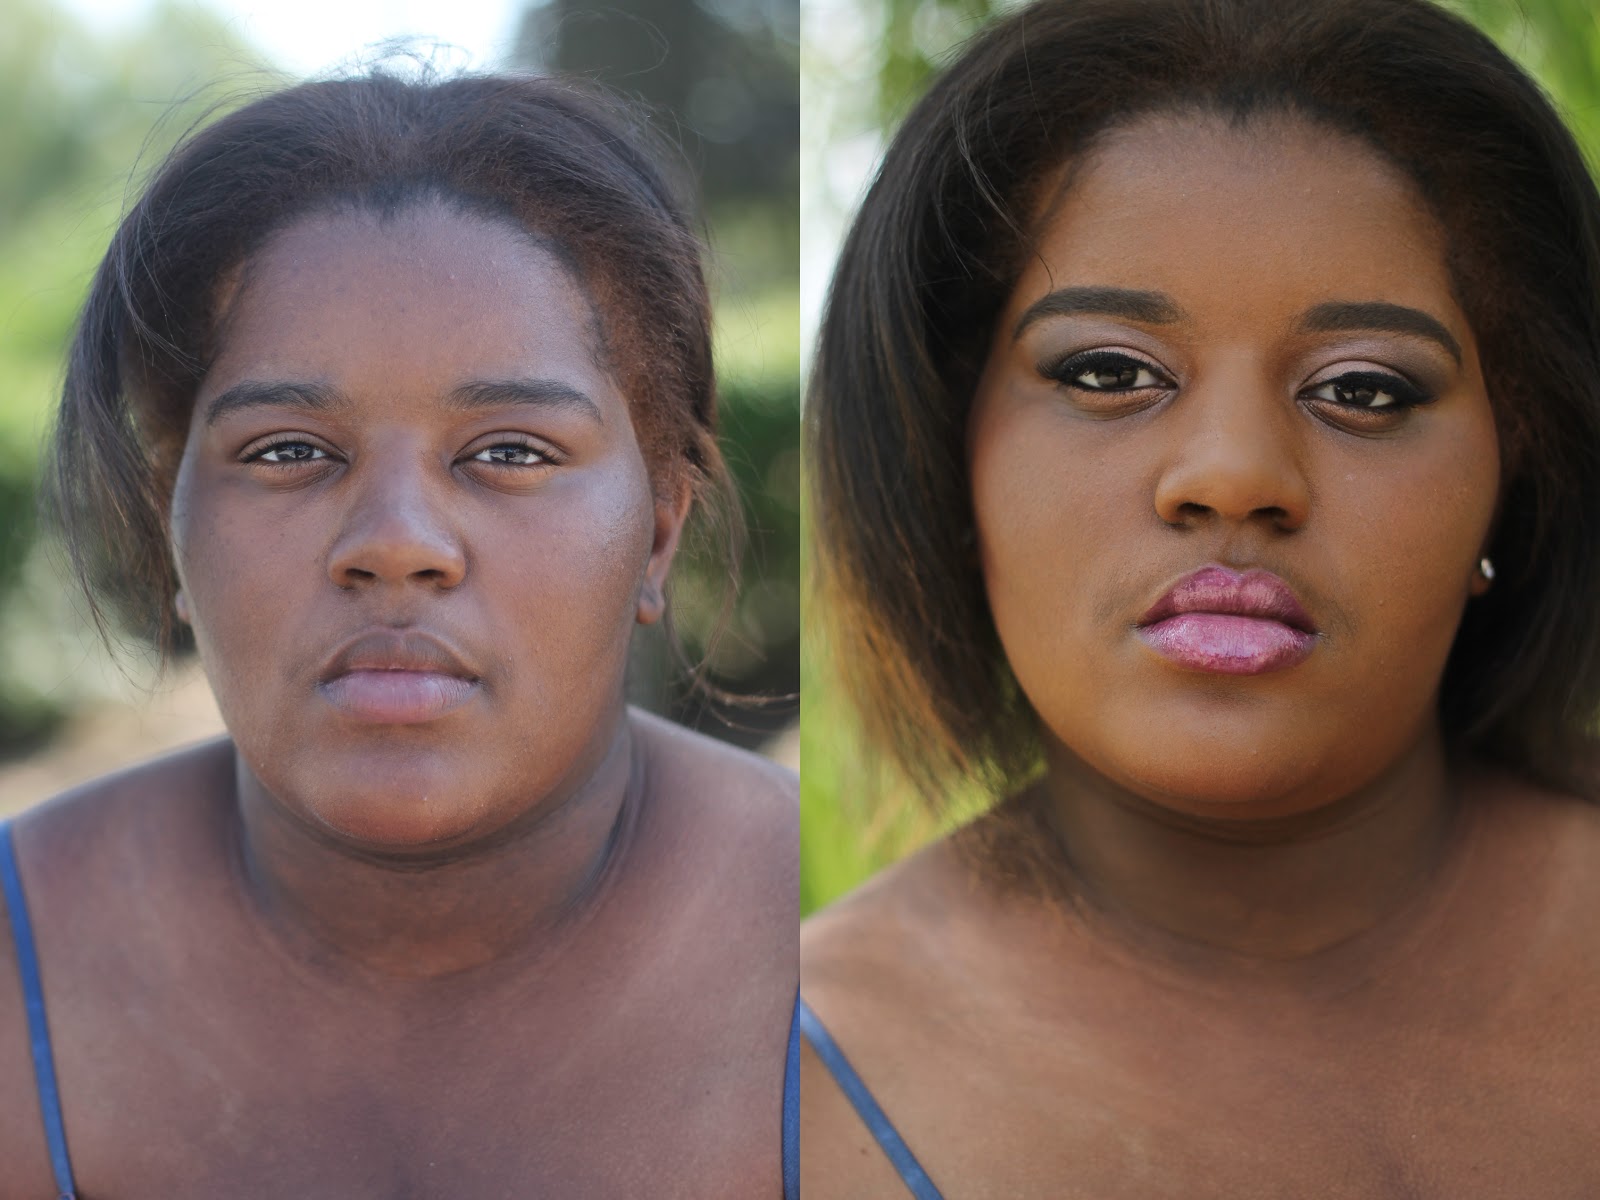
This week's model is actually a close friend of mine who wanted a makeover and photoshoot! So what better time to do a double whammy and share some images on both aspects! Products used are listed after the jump!


The before and after snapshot, straight out the camera! 

And the finished product from the shoot!


Foundation: Studio Gear Face Primer and Black Opal Foundation Sticks in Heavenly Honey, Beautiful Bronze, and Suede Mocha


Powder: Black Opal Invisble Oil Block Powder and Ben Nye Banana Powder


Brows: Studio Gear Brow Definer in Deep Brown and Studio Gear Brow Set


Eyes: Crave Beauty Eyeshadow Trio in  Cinna-licious and Studio Gear Invincible Gel Liner in Onyx


Lips: Crave Beauty Lip Primer, Fashion Fair Lip Liner in Plum, and Crave Beauty Gloss in


Cheeks: La Femme Blush in Redwood


Photo was taken at Belle Isle Casino.


GlamourProductions Studios Presents.... A New Blog!

GlamourProductions Studios is proud to bring you the company's first blogging experience!  

This blog will consist of product reviews, makeup tips and tricks, fashion and styling tips and tricks, nail art and anything else beauty related! We will feature a Makeup Look and a Outfit of the Week, as well as a Photography Photo of the Week and a weekly Q & A section. This is also where you will be able to find updates on our non-profit division, GlamourProductions Studios as we kick-off our community service projects. How-to video tutorials are also coming soon!


Any products you would like to see reviewed or makeup looks you would like broken down, please send your suggestions to Ashlie@ALaurenArtistry.com! You can also send inquires for the Q & A section to the email, or leave them in the comments section!


Subscribe to our RSS feed or simply join the monthly mailing list at www.ALaurenArtistry.com to stay in the loop!


Love,

Ashlie Lauren

Makeup Artist/Photographer

www.ALaurenArtistry.com